

WordPress Dashboard Slow? Fix the Right Problem First
There is a very specific irritation in opening WordPress to make one small edit and then waiting on the dashboard like it’s thinking about whether you deserve access today. The…
Read

You probably searched for how to enable caching in WordPress because your site feels slow, and every WordPress speed guide mentions a common fix: turn on caching.
Caching can make public pages much faster. It can also show old content, break checkout, or make a form behave strangely if the wrong pages are cached.
TL;DR: Enable caching with your host, AirLift, or one caching plugin. Do not stack multiple page caches blindly. Then, exclude dynamic pages, preload the cache, and test as a logged-out visitor before you call it done.
The safe path is simple:
Here is the rule behind the whole guide: cache things that should look the same for everyone. Be careful with anything that changes by visitor, cart, session, role, login status, or live data.
Before installing a caching plugin, check your hosting dashboard.
Many WordPress hosts already include page caching, browser cache headers, CDN cache, Redis, Memcached, or a performance panel that controls several layers at once. If that cache is already active, adding another page-cache plugin may not make the site faster. It may just make stale pages harder to clear.
This is where caching gets annoying. A site owner enables host cache, installs a plugin, adds CDN rules, and then cannot figure out why last week’s homepage banner will not disappear. Start with three questions:
If you run WooCommerce, memberships, courses, bookings, or logged-in dashboards, also ask whether Redis or Memcached is available. That matters if you later add persistent object caching.
Caching is easier to manage when one tool clearly owns the page cache.
That does not mean your site can only have one cache layer. A normal website cache setup may use page cache, browser cache, object cache, and CDN cache. The problem is running several tools that all try to serve the same finished HTML page without a clear purge plan.
| Method | Use it when | Watch out for |
|---|---|---|
| Host caching | Your host gives you clear cache controls | A second page-cache plugin can cause stale-page confusion |
| AirLift | You want WordPress caching and performance handled with fewer manual settings | Do not stack it blindly with another optimization plugin |
| Caching plugin | Your host cache is missing, limited, or hard to control | Activation is not the same as setup |
| CDN or edge cache | You have global traffic and know how to set bypass rules | Full-page edge caching needs careful exclusions |
| Server rules | A developer manages Nginx, Varnish, Redis, or server config | Bad rules can be harder to undo quickly |
For most site owners, the practical choice is host caching, a performance plugin like AirLift, or a reputable caching plugin. If you are still comparing plugin options, BlogVault’s guide to WordPress cache plugins is a useful next stop.
One cache that purges correctly is better than three caches fighting each other.
“Caching” sounds like one switch. In WordPress, it is several layers that reduce repeated work.
| Cache type | What it saves | Best for | Be careful with |
|---|---|---|---|
| Page cache | Finished HTML pages | Blog posts, pages, landing pages | Cart, checkout, accounts, dashboards |
| Browser cache | Images, CSS, JavaScript, fonts | Repeat visits | Old design files after theme or plugin updates |
| Object cache | Database query results | wp-admin, WooCommerce, memberships, LMS sites | Needs Redis, Memcached, or host support |
| CDN or edge cache | Files, and sometimes full pages, near visitors | Global traffic | Personalized pages and cookies |
| Server or opcode cache | Compiled PHP/server-side work | Server efficiency | Usually controlled by the host |
Page cache is usually the first big win for public pages. Object cache is different. It helps when WordPress keeps asking the database similar questions, especially on logged-in or database-heavy sites.
Think of page cache as a prepared plate and object cache as a better-stocked kitchen. Both help speed. They solve different delays. If you want the broader background before choosing settings, start with learning how website caching works.
Most cache problems are reversible. They become stressful when nobody knows which cache is serving the old version. Before changing settings:
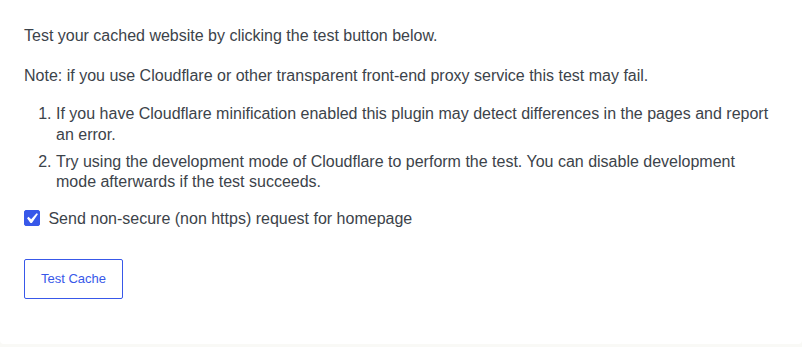
In our WordPress 6.9.4 test site, WP Super Cache 3.1.1 was installed and active, but caching still needed configuration. It also required a custom permalink structure before it could fully work.
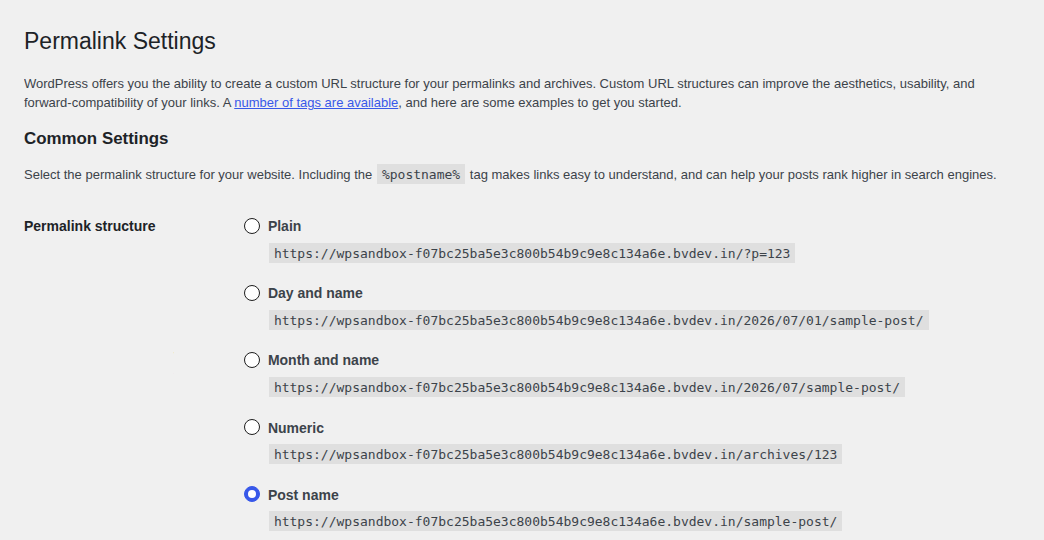
That is the lesson: an active caching plugin is not proof that caching is working.
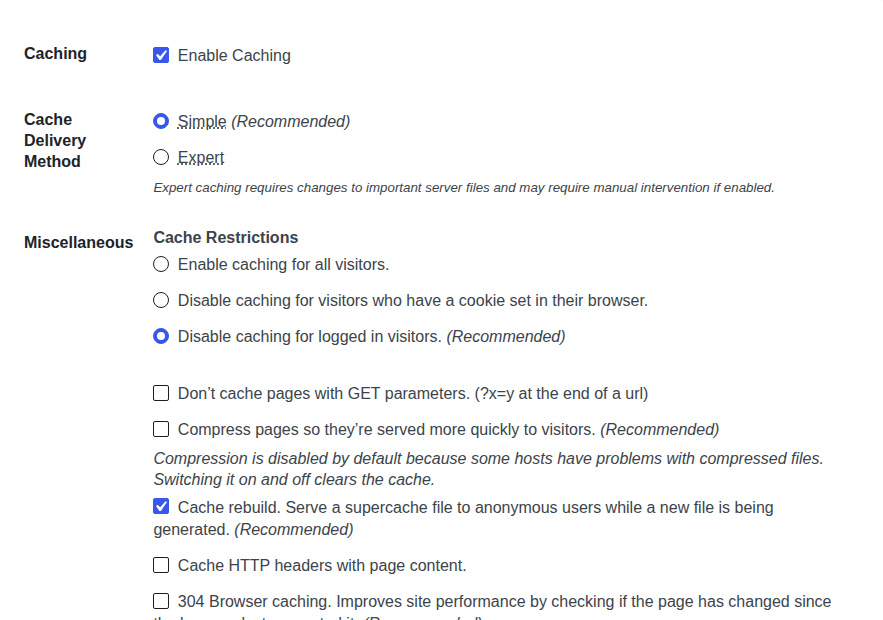
Page caching is the main setup step for most WordPress sites. It stores the finished HTML version of a public page so WordPress does not rebuild that same page from PHP, database queries, theme files, and plugins for every visitor.
Use the path that matches your setup:
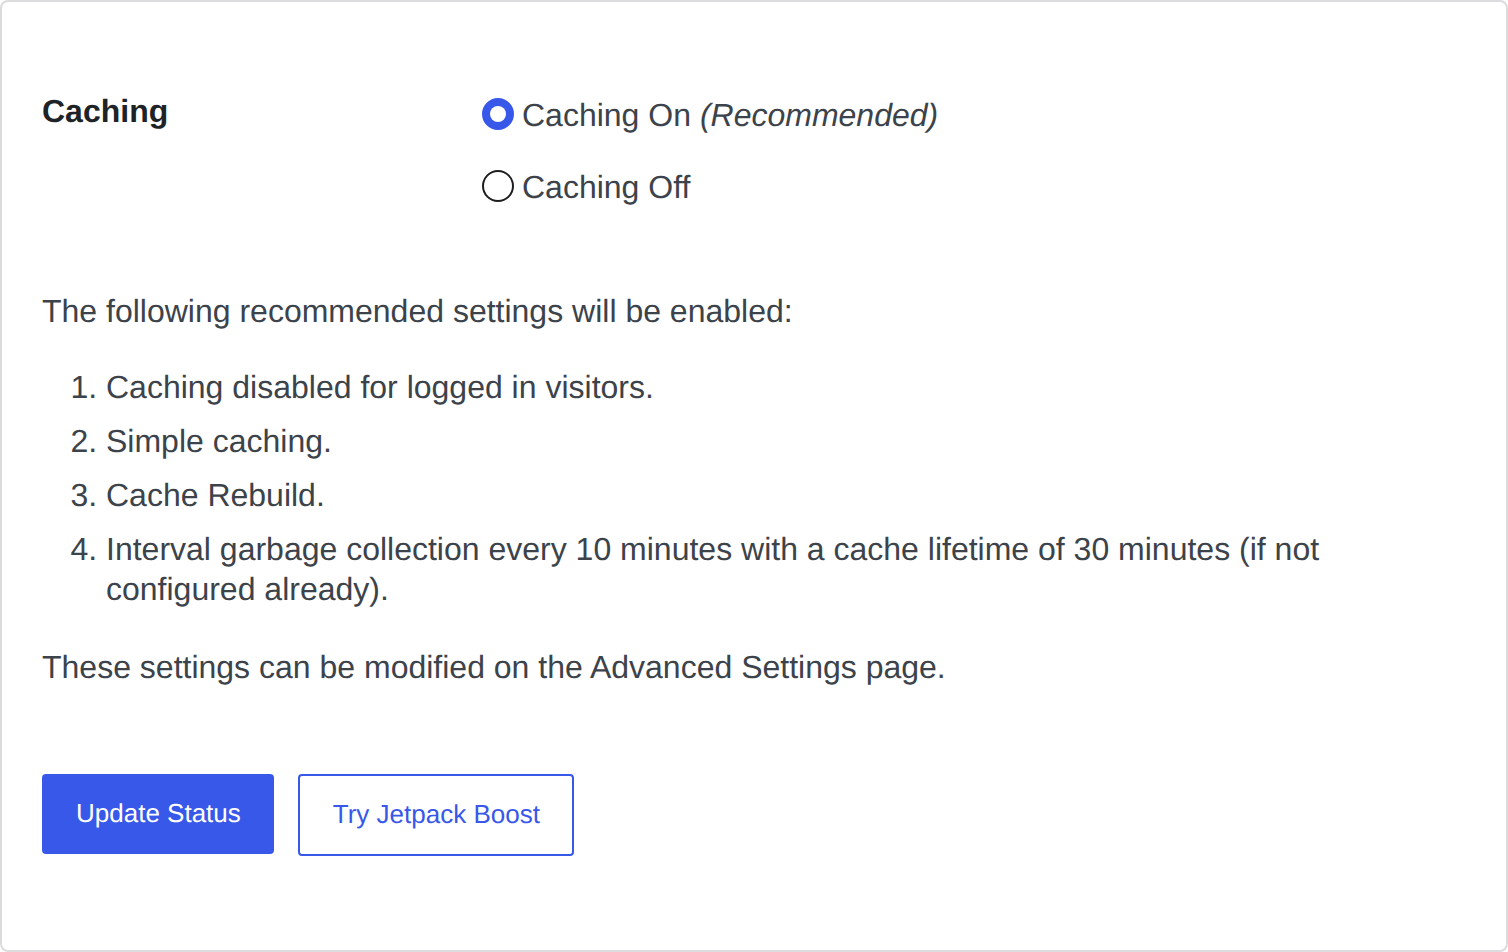
Do not turn on every optimization toggle at once. Leave CSS minify, JavaScript delay, database cleanup, image changes, and advanced CDN rules alone until page caching works. If something breaks, you need to know which setting caused it.
You may also see WP_CACHE in setup guides. That constant tells WordPress to load a page-cache drop-in used by caching tools. It does not create a working cache by itself.
Browser caching helps repeat visitors. Instead of downloading the same logo, stylesheet, font, or script on every page view, the visitor’s browser can reuse files it already has. This is useful for returning readers, shoppers, students, or members.
You can usually enable browser caching through your host, AirLift, a caching plugin, a CDN, or server rules managed by a developer. If fonts are a major part of your page weight, reducing font file size with font subsetting can support the same repeat-visit performance goal.
The technical mechanism is usually cache headers such as Cache-Control or Expires. The practical question is simpler: can the browser safely reuse this file, and will it receive the new version after you change the site?
Avoid copying random .htaccess snippets unless you have a backup and know how to recover the site. A bad server rule can turn a small speed task into downtime.
Object caching is useful, but it is not the beginner switch every site needs on day one. If this is the layer you need, start with a focused WordPress object cache plugin comparison before installing anything.
Page cache helps public pages. Object cache helps repeated database work. That makes it more relevant when WordPress is constantly checking orders, permissions, memberships, course progress, product data, reports, or logged-in user state. Use object caching when:
Redis and Memcached are server services that store data in memory. A WordPress plugin can connect to them, but it cannot invent server support if your host does not provide it. Do not full-page-cache wp-admin to make it faster. Admin screens change by user, permissions, forms, notices, and security tokens.
This is the part that prevents caching from becoming a support problem. Page cache is safest when every visitor should see the same content. A blog post usually qualifies. A checkout page does not. Exclude pages and paths that change by visitor, session, login status, cart, location, role, or live availability:
WooCommerce-aware cache tools often exclude cart, checkout, and account pages automatically. Still check the settings. The worst cache issue is not a stale blog post. It is a customer seeing the wrong cart, a private account view, or an old form confirmation.
A cache can be empty, warm, or stale. Visitors feel the difference.
Preloading, also called cache warming, visits important pages after a purge so the cache is ready before real visitors arrive. Use it for homepages, popular posts, landing pages, category pages, campaign pages, and high-traffic product pages. Purge page cache after changes to:
Many tools purge automatically after common WordPress edits. Trust that for routine edits, but manually check after a redesign, campaign launch, plugin change, or WordPress update.
Do not flush the object cache every time you edit a post. Flush it when database-backed data looks stale, during focused troubleshooting, or when your host recommends it.
Do not decide caching works from inside wp-admin.
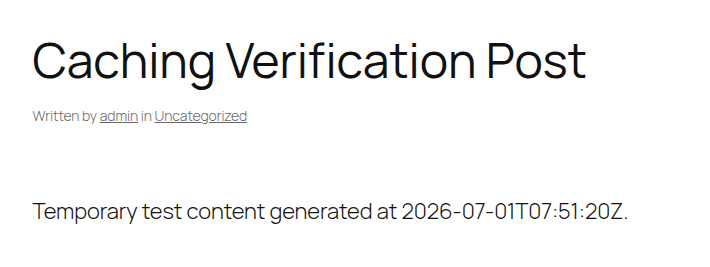
Logged-in users often bypass page cache. Admin bars, cookies, preview modes, and query strings can also change what you see. Use this checklist:
HIT, MISS, BYPASS, age, cache-control, or CDN cache status.TTFB means time to first byte. It is the wait before the browser receives the first response from the server. A working page cache often lowers TTFB on public pages because WordPress does less work before responding.
Page source can also show concrete cache evidence when your caching tool writes a generated-page marker.

The goal is not a perfect speed score. The goal is a site that is faster on public pages and still correct on dynamic pages.
When caching breaks something, simplify first. Turn off the newest setting, purge the relevant cache layers, and test one known page in a private window. Most cache issues come from stale files, missing exclusions, or an optimization setting that was turned on too early.
| Problem | Likely cause | What to do |
|---|---|---|
| Changes are not showing | Page, host, CDN, or browser cache is stale | Purge each cache layer and reload in a private window |
| Layout looks broken | CSS minify, combine, or delay setting | Disable CSS optimization first, purge, and retest |
| Menus, filters, or forms stopped working | JavaScript delay, defer, or combine setting | Disable JS optimization settings one at a time |
| Checkout or cart acts strangely | Dynamic pages are cached | Confirm cart, checkout, and account exclusions |
| Form confirmation looks wrong | Form or thank-you page is cached | Exclude the full form flow |
| wp-admin feels stale | Unsafe admin page caching or object-cache issue | Disable admin page caching and check object-cache status |
| First visit after purge is slow | Cache is cold | Enable preload for key URLs |
| Cache never hits | Logged-in testing, cookies, query strings, or exclusions | Test logged out and inspect headers |
If several things break at once, roll back to the last known working cache setting, purge, and re-enable features one group at a time. If you use AirLift and the problem persists, contact AirLift support with the affected URL, the setting you changed, and what you saw after purging.
Caching should make the site faster, not mysterious.
These mistakes look reasonable until they waste a Saturday.
For most sites, use the cache your host provides, AirLift, or one caching plugin. Start with the recommended page-cache settings, exclude dynamic pages, then test as a logged-out visitor. The best setup is the one you can understand, purge, and troubleshoot. A simpler cache that behaves predictably is better than a complicated stack nobody can clear.
Use host caching when your host provides clear controls, automatic WordPress purging, and good support documentation. Use a caching plugin when host caching is missing, limited, or hard to manage. Do not run both as full page caches unless your host says that combination is supported. Two tools saving the same finished HTML page can make stale content much harder to trace.
Yes, if checkout, cart, account, or session-specific pages are cached as public pages. A safe WooCommerce cache setup should bypass those pages and any fragments that depend on the visitor’s cart or login state. Many WooCommerce-aware cache tools add common exclusions automatically, but still check them. Checkout is not where you want to discover that “automatic” meant “mostly automatic.”
Test from an incognito window while logged out. Visit the same public page twice, inspect response headers or page source, and look for signs such as HIT, MISS, BYPASS, age, cache comments, or a lower TTFB on the second visit. Then edit a test page, purge the cache, and confirm the new version appears. A cache that is fast but hard to purge is not finished.
Usually, one cache layer is still serving the old version. Purge the plugin cache, host cache, CDN cache, and browser cache if needed, then reload the page in a private window. BlogVault’s guide to clearing WordPress cache is useful when you are not sure which layer still has the stale copy. If the old version still appears, check whether the page is being cached by a CDN rule, server cache, or browser asset cache. The annoying part is that the stale copy may not be coming from WordPress at all.
Good WordPress caching is not about turning on the most switches. It is about choosing one main cache owner, keeping dynamic pages out of the page cache, and proving the result as a logged-out visitor.
Do that, and caching becomes what it should be: a speed improvement, not a debugging project.
There is a very specific irritation in opening WordPress to make one small edit and then waiting on the dashboard like it’s thinking about whether you deserve access today. The…
Read

Your WordPress site feels slow, PageSpeed gives you a score, and every fix sounds urgent. One person says to install a cache plugin. Another blames hosting. A third says to delay…
Read

Your WordPress site feels slow. Speed tests look bad, and every guide offers a different fix: caching, image optimization, better hosting, or installing plugins. Speed work gets…
Read
Airlift works out what each page needs and applies it. Free to try on your own site.